Drylining · 15 MINUTE CPD
Drylining: Check the System Before Closing Up
Look beyond a smooth finish. Check drylining frames, board layers, insulation, head details and service interfaces against the specified system before the evidence is hidden.


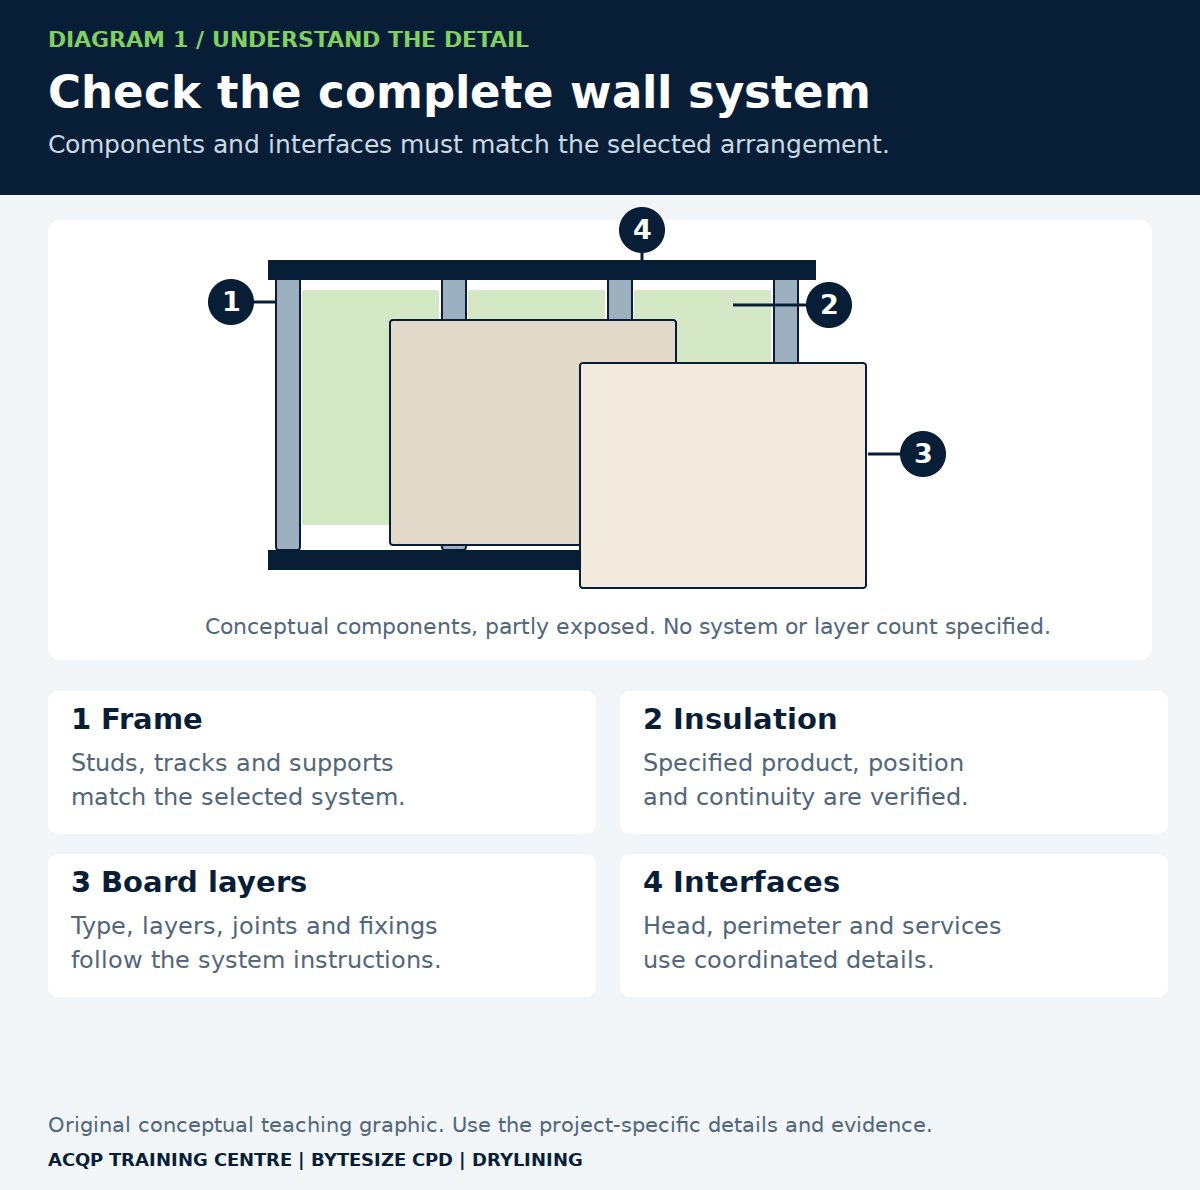
A smooth finished wall tells you little about the system behind it. Drylining performance depends on a defined combination of framing, boards, insulation, fixings, joints and interfaces. Inspection is most useful while these parts remain visible. This CPD focuses on checking the complete arrangement before closing up.
Your 15-minute activity: spend 10 minutes on the article and three diagrams, three minutes on the scenario and two minutes on reflection. Regulatory references concern England. This is an inspection-awareness activity; use the project-specific system details for acceptance.
1. Start with the system reference
Establish the purpose of the partition or lining. It may have requirements for fire resistance, sound insulation, height, robustness, moisture exposure and supported loads. Find the exact system reference and current details for its location. A board's colour, thickness or branding alone cannot establish the performance of a completed assembly.
Create a short inspection sheet that connects the wall number to the required performance and the specified components. Where a substitution is proposed, ask for the documented technical decision and supporting evidence before treating it as equivalent. General material and workmanship guidance supports checking suitability for the intended use. Approved Document 7: materials and workmanship
2. Check the frame before boards hide it
Use the drawings and system instructions to establish the framing arrangement, stud and track specification, centres, height limits, connections and support conditions. Inspect openings and abutments as well as straight runs. Door openings, heavy fixtures and changes in height may require particular details.
- Confirm that the frame matches the specified system and location.
- Check the supporting substrate and the specified connections.
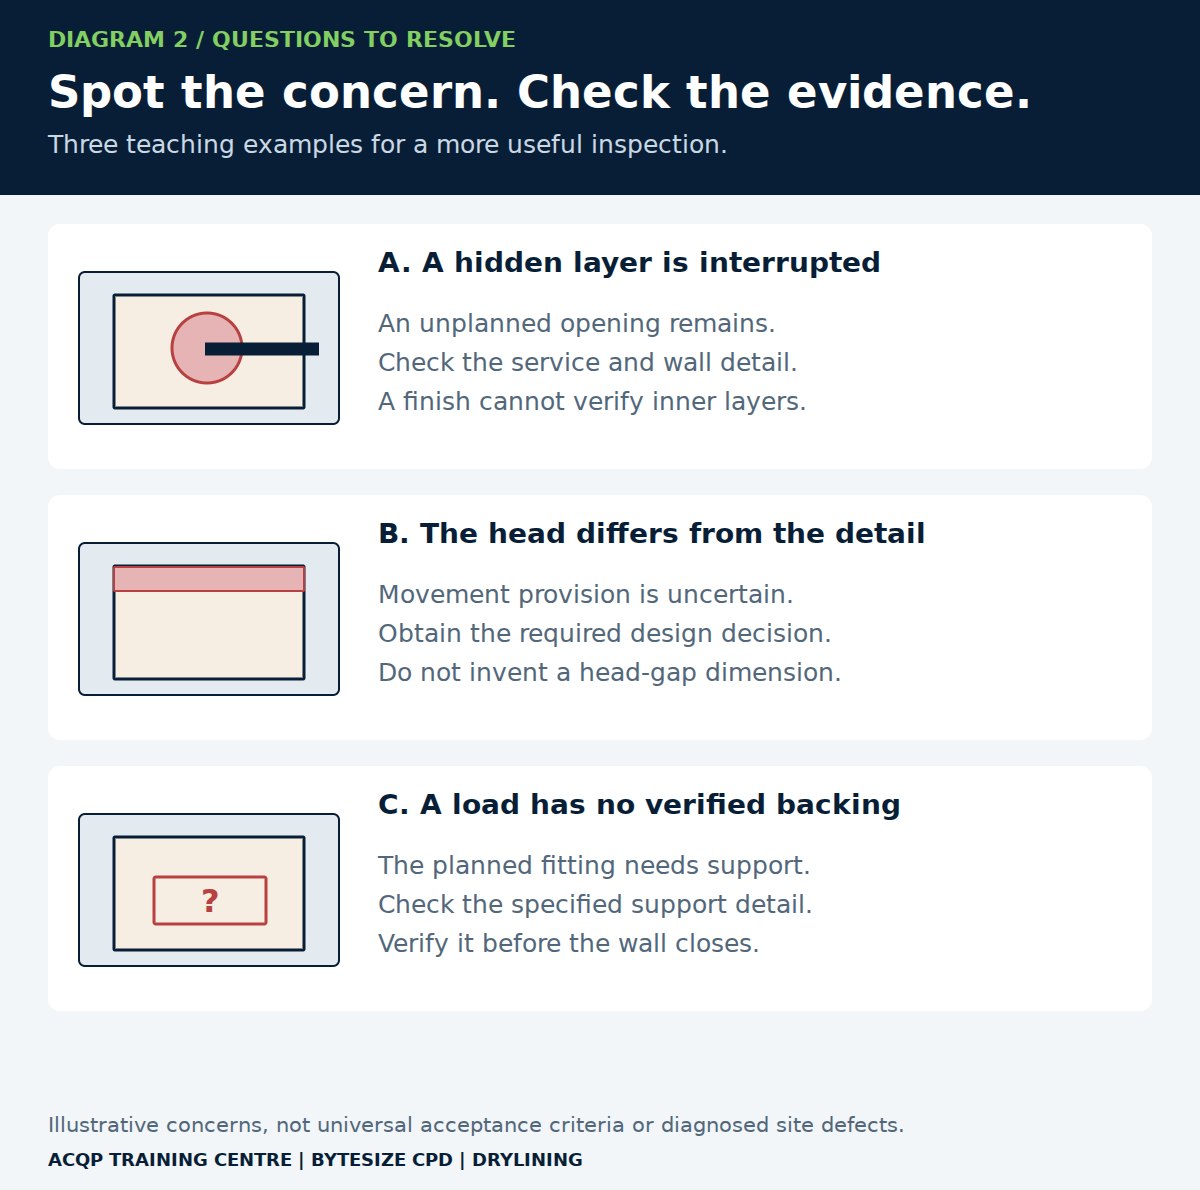
- Verify reinforcement or support for planned doors, sanitary fittings and other loads.
- Identify the head detail, expected movement and any required deflection provision.
- Record services that conflict with the framing before improvised cuts appear.
Do not provide your own fixing pattern or head gap because one worked elsewhere. Record the mismatch and refer it to the responsible designer or system provider through the project process.
3. Inspect each stage of boarding
Check board identity and condition before installation. Then compare the number of layers, orientation, joint arrangement, edges, fixing type and fixing positions with the selected system. Verify inner layers while they remain visible; the outer face cannot prove their continuity.
Look for damage around fixings, unsupported edges, unplanned openings and changes to the specified joint treatment. Record what you find and use the installation criteria to determine the response. A neat skim or taped finish is a finishing observation, not proof of the wall's fire or acoustic performance.
Where insulation forms part of the system, verify its product, thickness, position and continuity before the second face closes. Do not assume any mineral wool or offcut will provide the required result.
4. Give junctions and services their own checks
Walls meet floors, soffits, columns, façades and other partitions. These interfaces need coordinated details that preserve the required performance while allowing any designed movement. British Gypsum's junction guidance highlights the importance of evidence for these connections. A tested wall description does not by itself answer every site junction. British Gypsum: fire-rated junctions
Check service penetrations and access panels against their own compatible details. Firestopping requires an arrangement appropriate to the supporting construction, opening and service. Do not accept ordinary filler or foam merely because the exposed surface looks closed.
For sound insulation, also consider paths around and through the partition. Perimeters, junctions and service openings deserve attention alongside the boards. Approved Document E provides the England regulatory context; the project acoustic design establishes the actual construction and any testing requirements. Approved Document E: sound insulation
5. Coordinate the inspection hold
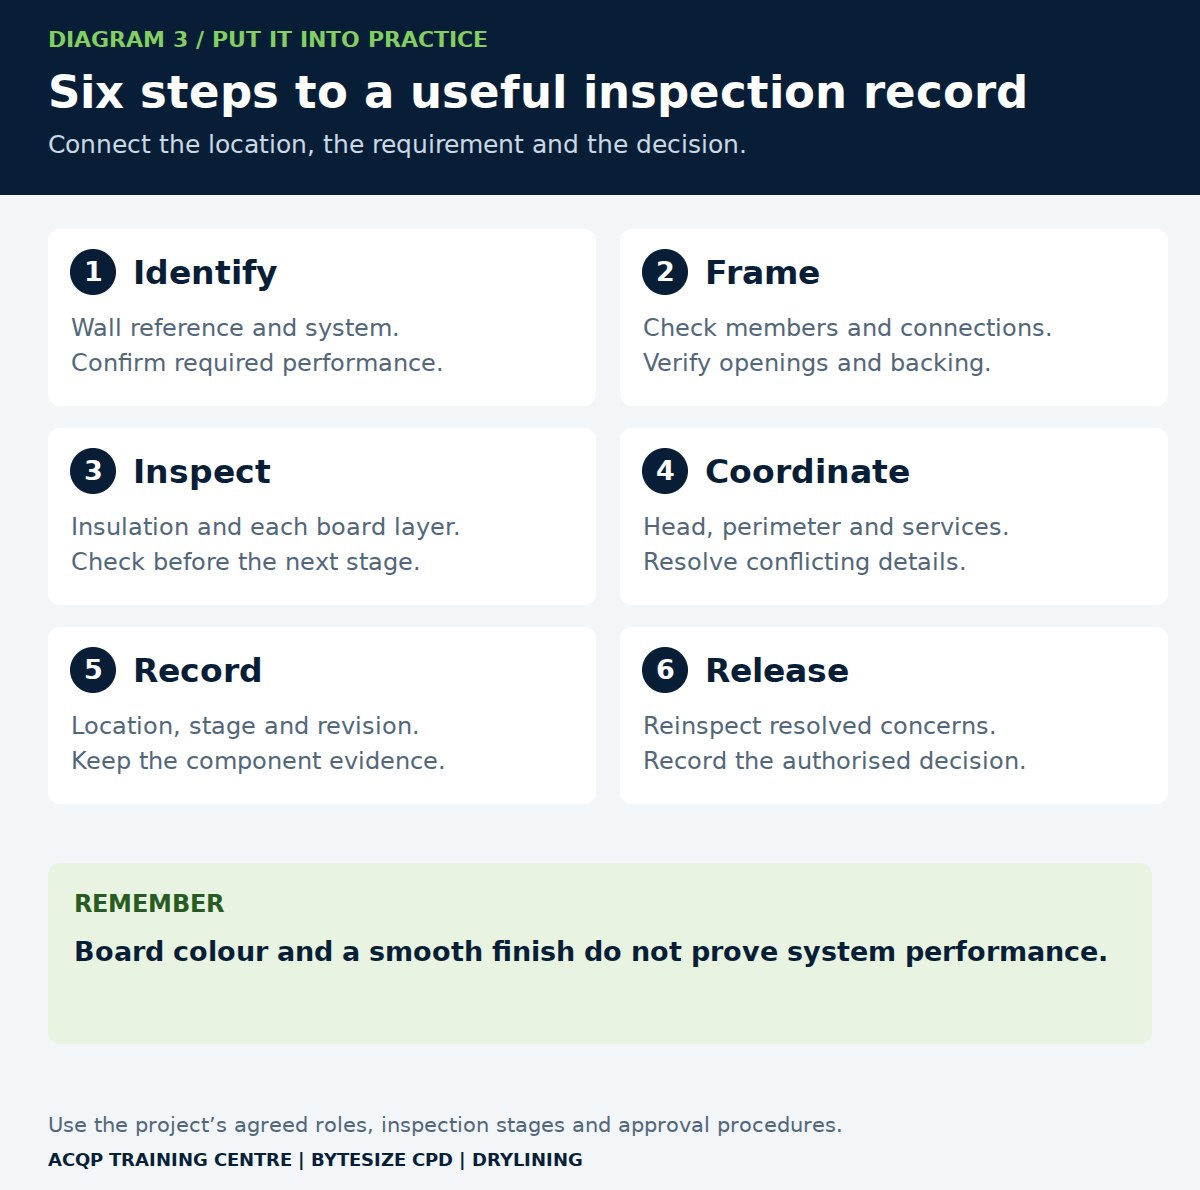
Agree the inspection stages with the installer and following trades. Useful stages may include the exposed frame, services and backing, insulation, inner board layers and final closure. Select stages that reveal the features the project needs verified rather than creating photographs simply to fill a folder.
Record the wall reference, side, level, drawing revision, system identity and work stage. Photograph an overview and the important interfaces. Note inaccessible areas and unresolved items. If services are added after inspection, assess whether the previous release still covers the altered work.
Diagram 3 provides a six-step aid. Its release step means the authorised person has checked the agreed conditions; it does not transfer the contractor's or designer's responsibilities to the inspector.
Site scenario: ready for the second face
A corridor partition is about to be closed. Its label identifies a two-layer system, but one inner layer has an unplanned opening around a pipe. The head differs from the drawing and the door-frame backing cannot be verified. The installer proposes to fill the opening later and complete the outer face now.
Pause for three minutes: Which parts can be checked now? What would you request before agreeing that this stage is complete?
Suggested response: identify the exact wall system and coordinated head, door and penetration details. Record the opening and outstanding backing check. Obtain an appropriate correction or design clarification, then inspect the parts that will become hidden. Keep the affected area accessible through the agreed hold process. Do not infer system performance from a promise of later finishing.
Take this to your next inspection
Select one wall and ask: can I connect every hidden component and critical junction to its current detail? Identify the next feature to be concealed and schedule the check while it is still visible.